Project Deadpool

Hardware
All prices in CAD
- Intel i7-4790K | $475.00
- Asus Maximus VII Formula | $525.00
- Corsair Vengeance (Red/Black) 32GB 4X8 2400Mhz | $185.00
- MSI R9 390 8GB Gaming | $450.00
- Corsair 760T Black | $240.00
- Asus Xonar DSX | $70.00
- Corsair H100i V2 | $135.00
- EVGA Supernova 750 G2 | $145.00
- Adata SX900 256GB | $160.00
- Mushkin Reactor 1TB | $250.00
- 2x Seagate Barracuda 3TB HDD | $125.00 each
- 2x Seagate Barracuda 1TB HDD | $60 each
- 1x Western Digital Green 2TB HDD | FREE (from work)
- 3x Corsair AF140 Red LED fan | $25.00 (2 came with case)
- 2x Corsair SP 120 Red LED fan | $20.00
- Corsair AF 120 Red LED fan | $20.00
- @CableMod Red/Black E-Series Sleeved Cables | $10.00
- 3x White LED strips from Amazon (50CM) | $3.00 each
- 6x Red LED strips from Amazon (50CM) | $3.00 each
- Windows 10 Pro | FREE (through MSDNAA)
Peripherals
- 2x 24” Asus VS248H-P | $250.00 each
- Corsair K70 RGB | $180.00
- Razer Mamba 2012 | $150.00
- Razer Goliathus (Large) | $20.00
- Audio Technica ATH-M50x | $180.00
- Audio Technica AT-2020 USB | $200.00
- Generic mic arm w/ shockmount & popfilter | $60.00
- Generic dual monitor stand | $100.00
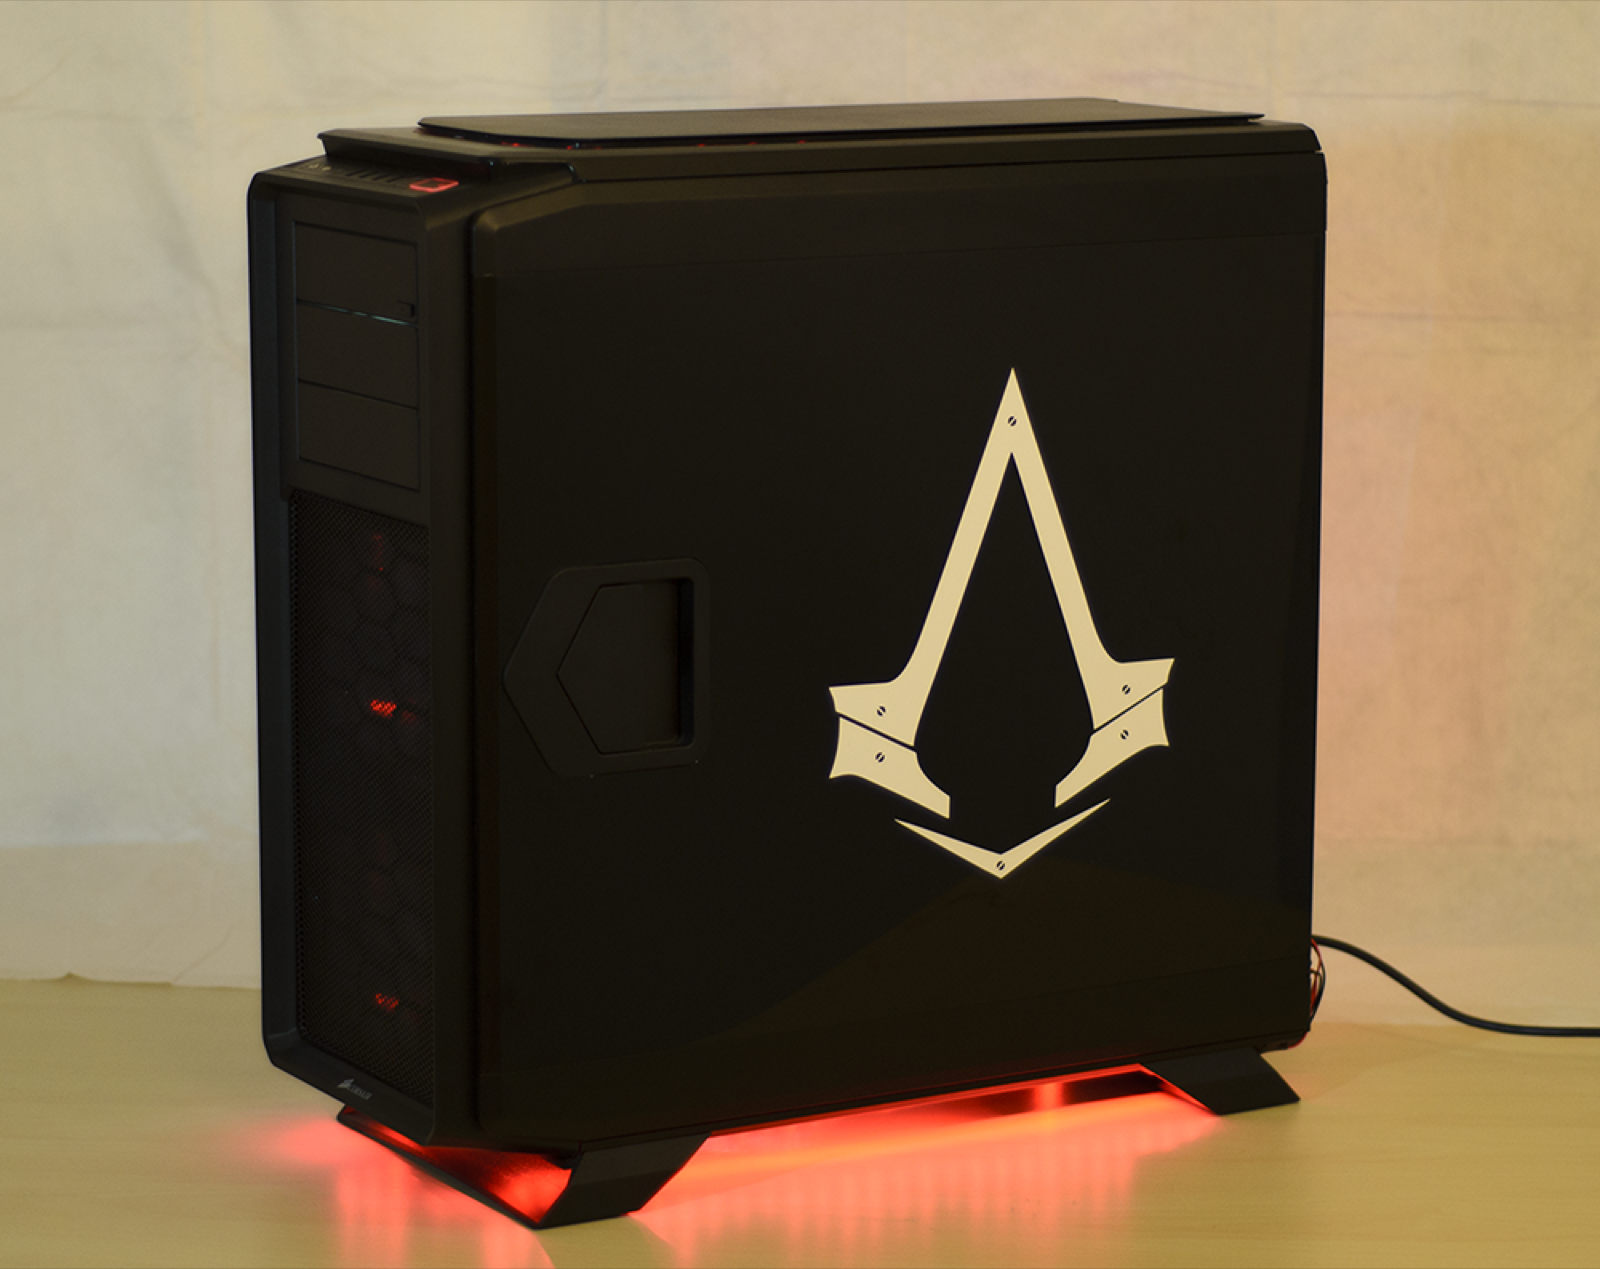
Why “Deadpool”
I often get asked why I chose the name deadpool when there is a large Assassin’s Creed logo on the right sidepanel. The name has nothing to do with the AC logo but instead comes from my naming scheme. Each of my electronic devices are named after a Marvel character, since I chose a red/black color theme for this build I thought the name deadpool would suit it well. For added effect I also placed a deadpool bobble head inside of the case… he’s also preventing GPU sag ;)
Inspiration
Way back in grade 10 I built my first computer. It was quite the challenge and just the idea of completing a low end gaming computer was awesome. It was my first ever build known as Project-Firestorm. It featured many mid-range components for it’s time, including a 560ti and a 2500K. It didn’t have any specific themes other than the NZXT orange LED strip and the black NZXT tempest elite. This computer was my pride and joy up until last year when I decided it was time for an upgrade. Over the past year I have slowly been upgrading the internals of project firestorm until I had enough new components to split into two computers, being able to rebuild my original and start fresh with Project Deadpool.
After spending many hours watching various reviews I was set on purchasing the 760T to house my new beast. So after a few pieces of contract work I ordered the Corsair 760T along with the ram kit and the cablemods cables, targeting a red and black theme. Sadly the build process would have to wait since it was the week before exams when all of the parts were ready to go. After my exams were done I finally had time to finish this beast, spending a good 4 hours one night I transferred all of the shiny new guts of project-firestom into project-deadpool and then restoring project-firestorm to it’s original state. Sadly I didn’t document this process so there are no images, but I must admit it was quite fun to be building a second computer!
Challenges/Mods
Since this was my second time building a computer my main goal was aesthetics. I already had the power available to me. There were three main challenges I faced during the process:
- The USB header cables were random colors
- The MSI logo glows white and I wanted it to be red
- The roof of the 760T was sitting right on top of the case, with no room for air circulation.
- Cable combs were hard to find, and way to expensive to ship to Canada (once my student loans were depleted)
Here’s how I fixed these issues:
- Well this fix may seem cheesy and is only a short term, cheap fix, all I did was wrap the multicolored cables tightly in matte black electric tape. This helps the cables look hidden so people’s attention isn’t drawn there. My long term goal will be to custom sleeve them.
- I attempted a few things to fix this issue. My first thought was to take a red sharpie and marker over the white area of the logo. While this did produce a red color, the shading was very uneven and it looked terrible. My next plan was to tape some red plastic over the LED, and again this worked but the lighting was uneven. So I ended up bying a “sample” of red vinyl wrap for a car (5”x5”) for like 3 bucks on e-bay, shipped from within Canada. I then took a piece of paper and traced the area of the dragon LED. I then used this paper template to cut the vinyl sticker and carefully applied it over the sticker. It produced some nice results, as seen in the images below.
- This fix was quite simple. I grabbed some magnets from the dollar store and placed them between the top of the case and the roof hatch. They magnets are black so they blend in well however they give almost 1cm for airflow, which is plenty for the top mounted H100i v2.
- Lastly the hardest challenge was finding cable combs for my sleeved cables. First of all the E-series sleeved cables had 26 wires instead of 24 for the ATX cable, so this didn’t meet most requirements for cable combs. I also wanted to go with red/black cable combs instead of clear, since I don’t really like the look of clear ones. I ended up finding some cable combs but it would have been over $50 just to get them to my place. So I resorted to my next best option, make some cable combs my self. I found a nice template online and modified it to suit my needs: 14pin Gfx card (6 & 6 + 2) and the 26 pin ATX. I was able to print these in red & black for free at my university’s maker space and boy did they ever turn out great!
Long Term Goals
For now I have a powerful enough PC to suit my gaming needs, so my future goals will focus on the aesthetics of the build. My ultimate goal is to hardline the build with red liquid. However some more realistic goals include: fully sleeved cables, including USB headers, Fans and Sata cables; Better cable management (which should be easy!); and have the front grill go from bottom to top, removing the 5” drive bays. I remember seeing someone who did this somewhere but I can’t seem to find it again… if anyone knows where this is from please let me know!
Photos
As of August 4th, 2016